VS Code Custom Agent 使用指南
簡介
什麼是 Custom Agent?
Custom Agent 是 VS Code 中 GitHub Copilot Chat 的自訂代理設定。它可以讓你針對不同開發任務,預先定義 AI 應該扮演的角色、可使用的工具、模型偏好與工作流程,讓 Copilot 在切換到該 agent 後,以更貼近任務需求的方式回應。
內建 agent 通常適合一般用途,但實際開發時,不同任務會需要不同的行為模式。例如規劃階段可能只需要讀取與搜尋工具,避免 AI 直接修改檔案;實作階段則需要編輯工具;Code Review 階段又會更重視安全性、可維護性與測試覆蓋。Custom Agent 的價值就在於把這些設定整理成可重複使用的工作角色。
Custom Agent 會定義在 .agent.md Markdown 檔案中,可以放在工作區內與團隊共享,也可以放在使用者層級,讓你在不同專案中重複使用。
適合使用情境
- 規劃任務:建立只具備讀取與搜尋能力的 planning agent,用來整理需求、分析程式碼與產出實作計畫。
- 功能開發:建立 implementation agent,讓 AI 依照專案規範進行程式碼修改與測試。
- 程式碼審查:建立 review agent,專注檢查安全性、可讀性、錯誤處理與測試缺口。
- 專案特定流程:針對團隊內固定流程,例如產生測試、撰寫文件、維護 API 規格,建立可重複使用的 agent。
- 多階段工作流:透過 handoffs 在不同 agent 之間交接,例如從規劃 agent 交給實作 agent,再交給審查 agent。
Custom Agent 與其他自訂能力的差異
VS Code Copilot 提供多種自訂方式,容易混在一起使用。簡單來說,可以依照使用目的區分:
| 類型 | 適合情境 |
|---|---|
| Custom Agent | 需要長期使用的角色設定,包含工具限制、模型偏好或 agent 之間的交接流程 |
| Prompt File | 一次性或重複使用的提示詞任務,不一定需要限制工具或定義角色 |
| Instructions | 提供專案或使用者層級的通用行為規範 |
| Skills | 封裝可攜式能力、腳本、資源與特定工作流程 |
如果只是希望 Copilot 在某個專案中遵守固定寫作或程式碼風格,通常會使用 instructions。若你需要的是「切換到特定角色,並讓它只拿到某些工具」,Custom Agent 會更適合。
Custom Agent 檔案位置
Custom Agent 可以定義在工作區、使用者層級,或由組織提供。常見位置如下:
| 範圍 | 預設位置 | 說明 |
|---|---|---|
| Workspace | .github/agents |
放在專案中,適合與團隊共享 |
| Workspace(Claude 格式) | .claude/agents |
支援 Claude sub-agents 格式,也能被 VS Code 偵測 |
| User profile | ~/.copilot/agents 或 VS Code 使用者資料位置 |
適合個人跨專案重複使用 |
若專案需要其他搜尋位置,可以透過 chat.agentFilesLocations 設定讓 VS Code 額外載入指定資料夾中的 agent 檔案。
在 monorepo 情境中,也可以啟用 chat.useCustomizationsInParentRepositories,讓 VS Code 從父層 repository 根目錄探索 customizations。
Custom Agent 檔案結構
Custom Agent 使用 Markdown 撰寫,檔名通常為 .agent.md,內容分成兩個部分:
- YAML frontmatter:設定 agent 名稱、描述、工具、模型與 handoffs 等屬性。
- Markdown body:撰寫 agent 的行為準則、回應風格、工作流程與注意事項。
基本結構如下:
1 | --- |
Frontmatter 常用欄位
| 欄位 | 說明 |
|---|---|
name |
Agent 顯示名稱。若未指定,會使用檔名作為名稱 |
description |
Agent 的簡短描述,也會顯示為 Chat 輸入框中的提示文字 |
argument-hint |
顯示在 Chat 輸入框中的提示文字,用來引導使用者如何輸入任務 |
tools |
此 agent 可使用的工具清單,可包含內建工具、tool set、MCP 工具或 extension 提供的工具 |
agents |
允許此 agent 呼叫的 subagents 清單,可使用 * 允許所有 agent,或使用 [] 禁止使用 subagent |
model |
指定執行時使用的模型,也可以設定為模型優先順序清單 |
user-invocable |
控制 agent 是否出現在 Chat 的 agents 下拉選單中,預設為 true |
disable-model-invocation |
控制此 agent 是否能被其他 agent 以 subagent 方式呼叫,預設為 false |
target |
指定 agent 的目標環境,例如 vscode 或 github-copilot |
mcp-servers |
搭配 target: github-copilot 使用,定義 GitHub Copilot 可用的 MCP server 設定 |
handoffs |
定義 agent 完成回應後可交接到哪些下一步 agent |
hooks |
Preview 功能,可設定只在此 agent 啟用時執行的 hook commands |
提示:如果某個工具在目前環境中不可用,VS Code 會忽略該工具設定,不會因此讓整個 agent 無法使用。
Body 撰寫方式
YAML frontmatter 下方的 Markdown body 是 agent 的實際行為描述。你可以在這裡撰寫角色定位、工作步驟、回應格式、限制條件與注意事項。
Body 也可以透過 Markdown 連結引用其他檔案,例如共用的 instructions 檔,避免在多個 agent 中重複維護相同規則。
如果要在 body 中明確提到某個工具,可以使用 #tool:<tool-name> 語法,例如:
1 | When external documentation is needed, use #tool:web/fetch to retrieve the official source before answering. |
建立 Custom Agent
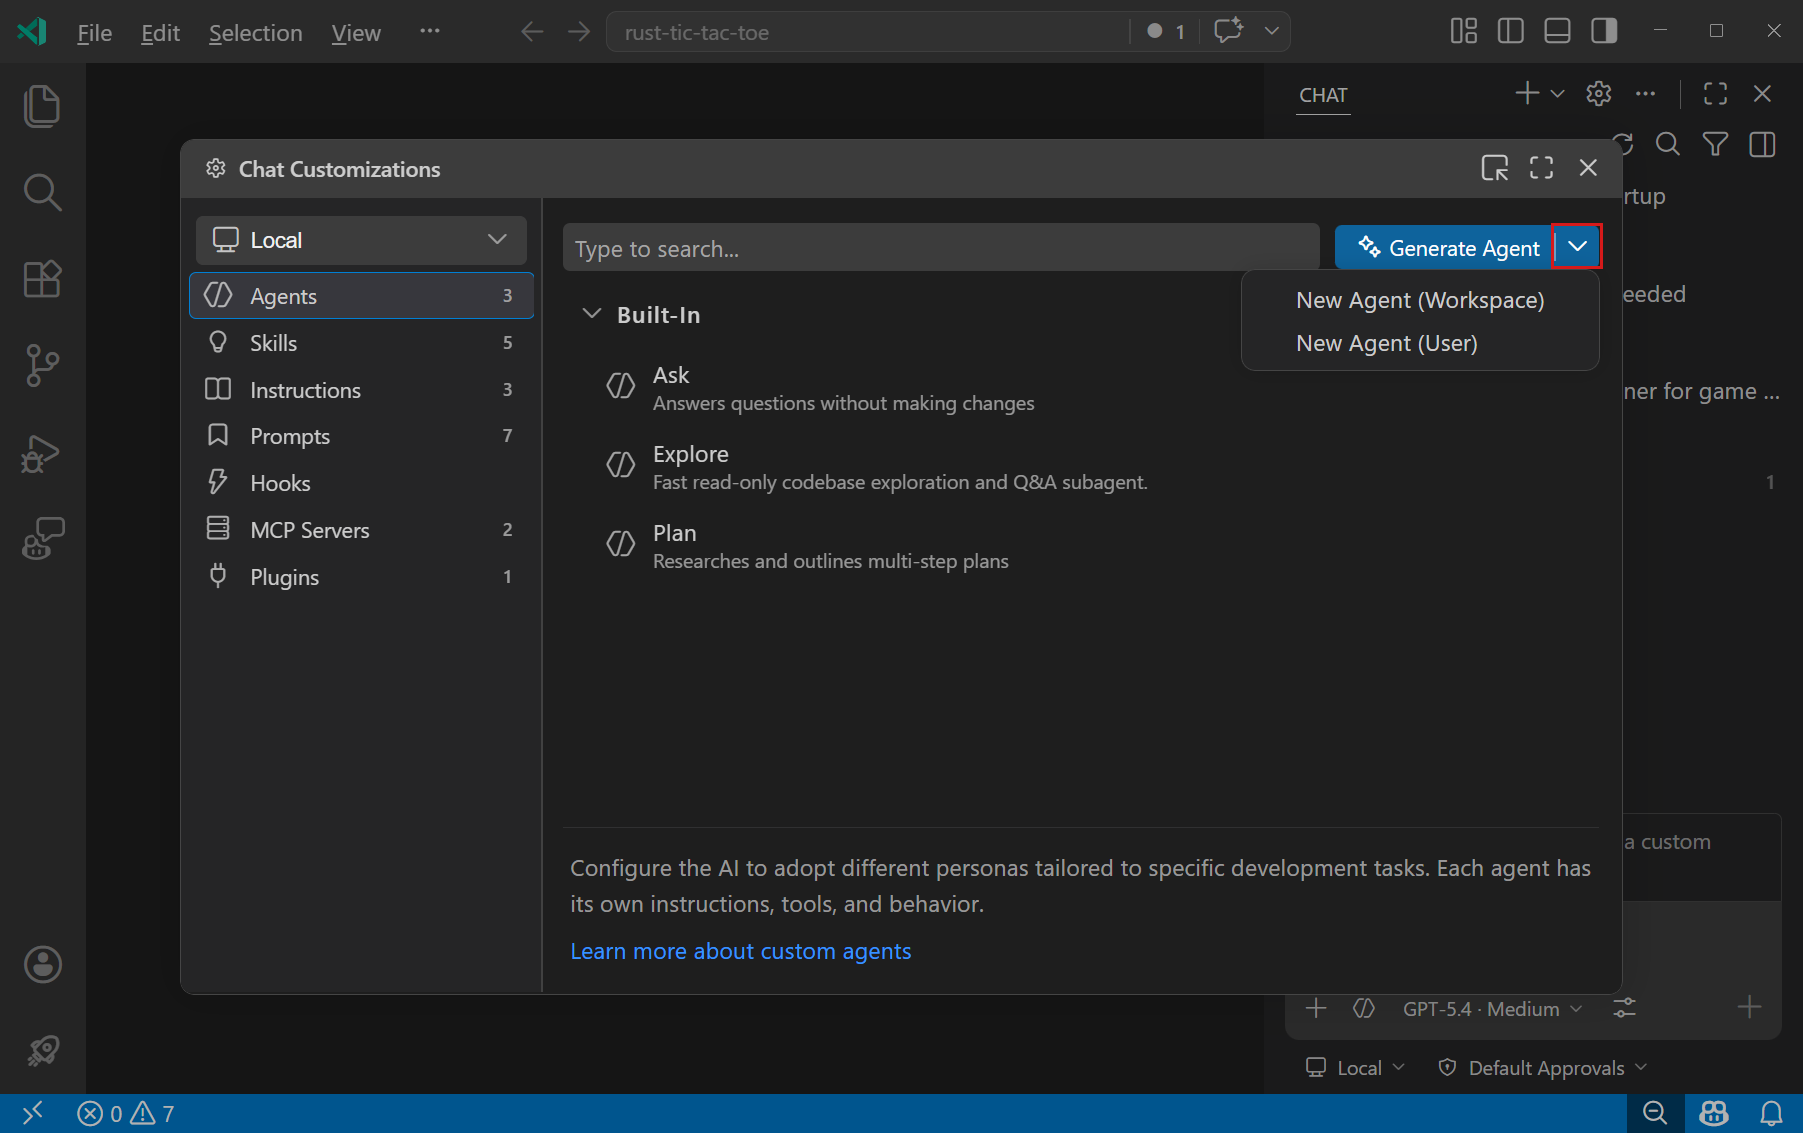
方式一:透過 Agent Customizations editor 建立
VS Code 提供 Agent Customizations editor,可以集中管理 agents、prompt files、instructions 與 skills。
- 開啟 Copilot Chat。
- 點擊 Configure Chat 圖示,開啟 Agent Customizations editor。
- 切換到 Agents 頁籤。
- 從下拉選單選擇 New Agent (Workspace) 或 New Agent (User)。
- 輸入檔名後,VS Code 會建立新的
.agent.md檔案。 - 在 frontmatter 補上名稱、描述、工具與其他設定,並在 body 撰寫 agent 指令。
也可以透過命令面板執行 Chat: New Custom Agent 建立新 agent。
方式二:使用 /create-agent 產生
如果還不確定 agent 該怎麼設計,可以在 Agent mode chat 中輸入 /create-agent,再描述你想建立的角色,例如:
1 | /create-agent 建立一個專門做安全性審查的 agent |
Copilot 會根據你的描述詢問必要問題,並產生對應的 .agent.md 檔案,包含適合的工具、指令與 frontmatter。
方式三:從既有對話萃取
當你完成一段多輪除錯、重構或審查流程後,也可以請 Copilot 將這類工作整理成 agent。例如:
1 | make an agent for this kind of task |
這種方式適合把已經驗證過的工作流程固定下來,之後遇到類似任務時就能直接切換使用。
實作範例:建立 Planning Agent
以下範例建立一個 planning.agent.md,專門負責在實作前收集上下文、分析風險並產出計畫。這類 agent 適合限制為讀取與搜尋工具,避免尚未確認方向前就直接修改檔案。
檔案位置:.github/agents/planning.agent.md
1 | --- |
這個範例有幾個重點:
| 設定 | 用途 |
|---|---|
tools: ['search', 'web'] |
限制 agent 只使用搜尋與網頁查詢相關工具 |
handoffs |
規劃完成後顯示交接按鈕,讓使用者切換到 implementation agent |
send: false |
切換 agent 後只預填 prompt,由使用者確認後再送出 |
| Markdown body | 明確定義工作流程與限制條件 |
Handoffs:建立多階段工作流
Handoffs 是 Custom Agent 中很實用的設計。它可以在某個 agent 完成回應後,顯示下一步按鈕,讓使用者帶著上下文切換到另一個 agent。
官方文件中提到幾種常見流程:
- Planning → Implementation:先由 planning agent 產生計畫,再交給 implementation agent 開始實作。
- Implementation → Review:完成功能後切換到 review agent,檢查品質與安全性。
- Write Failing Tests → Write Passing Tests:先產生失敗測試,確認測試符合預期後,再交給另一個 agent 實作讓測試通過。
handoffs 設定會放在 frontmatter 中,每一個 handoff 可以指定按鈕文字、目標 agent、預填 prompt、是否自動送出,以及要使用的模型。
1 | handoffs: |
如果 send 設為 true,VS Code 會在切換到目標 agent 後自動送出 prompt。若希望保留人工確認步驟,建議維持 false。
管理與分享 Custom Agent
顯示或隱藏 agent
當專案或使用者層級累積多個 agents 後,可以自訂 Chat agents 下拉選單中要顯示哪些項目。
- 從 agents 下拉選單選擇 Configure Custom Agents。
- 將滑鼠移到指定 agent 上。
- 點擊眼睛圖示顯示或隱藏該 agent。
這只會影響下拉選單顯示,不一定代表 agent 檔案被刪除。
團隊共享
如果要讓整個團隊使用相同 agent,建議把 .agent.md 放在 workspace 的 .github/agents 資料夾中,並提交到 repository。這樣團隊成員開啟專案時,VS Code 就能偵測並載入這些 agents。
若組織需要跨多個 repository 共用 agents,也可以使用 GitHub organization level 的 custom agents。VS Code 會偵測目前帳號可存取的組織層級 agents,並與內建、個人與 workspace agents 一起顯示在 Chat agents 下拉選單中。若要啟用組織層級 agents 探索,可以設定:
1 | { |
移除 agent
若要完全移除自訂 agent,可以刪除對應的 .agent.md 檔案。也可以在 Configure Custom Agents 中將滑鼠移到 agent 上,點擊垃圾桶圖示移除。
如果 agent 是由 extension 提供,則需要移除提供該 agent 的 extension;若不想移除 extension,也可以只在下拉選單中隱藏它。
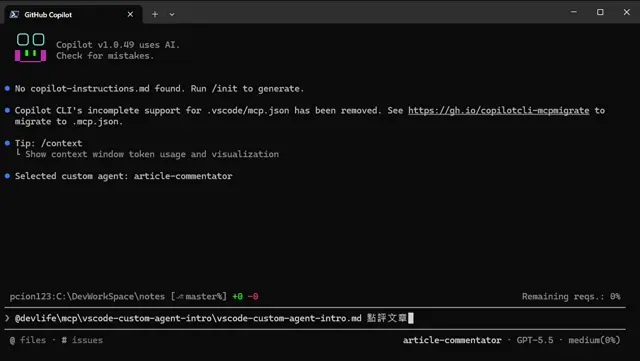
Copilot CLI 實際Demo
以下示範切換到自訂的 article-commentator agent,請 Copilot 針對目前文章提出評論與修改建議。
啟用這個 agent 後,Copilot 會依照預先定義的角色設定,從文章結構、段落流暢度、標題清楚度,以及技術內容可能存在的風險等面向進行檢視。這類任務通常以閱讀、分析與回饋為主,不需要直接修改檔案,因此特別適合設計成評論型 agent,讓輸出更聚焦於具體可執行的編修建議,而不是直接重寫整篇內容。
注意事項
Tool list priority
如果 custom agent 和 prompt file 都設定了 tools,prompt file 的工具清單會有較高優先權。也就是說,當你在特定 prompt file 中指定工具時,該 prompt file 的設定可能會覆蓋 agent 本身的工具設定。
Custom Agent 與 Chat Mode 的關係
Custom Agent 以前稱為 custom chat modes,功能概念相同,但現在改以 custom agents 命名,更能表達它是針對特定任務自訂 AI 行為的用途。
如果你已經有舊的 .chatmode.md 檔案,可以將它重新命名為 .agent.md,並放到對應的 agent 檔案位置,讓 VS Code 以新的 custom agent 格式載入。
安全性建議
Custom Agent 可以限制可用工具,這在安全敏感任務中特別重要。例如 planning 或 review 類型的 agent,可以只開放讀取與搜尋工具,避免 AI 在尚未確認前直接修改檔案。
當你要把 agent 放進 repository 與團隊共享時,建議檢查:
- 工具清單是否符合最小權限原則
- 指令是否清楚描述 agent 能做與不能做的事情
- 是否避免讓不需要修改檔案的 agent 取得編輯工具
- 是否需要透過 handoffs 保留人工確認點
常見問題
如何快速開啟 Custom Agents 設定?
可以在 Chat 輸入框輸入 /agents,快速開啟 Configure Custom Agents 選單。也可以從命令面板執行 Chat: Open Customizations,開啟 Agent Customizations editor。
如何知道某個 agent 來自哪裡?
在 Chat 的 agents 下拉選單中選擇 Configure Custom Agents,將滑鼠移到目標 agent 上,VS Code 會在 tooltip 中顯示來源位置。
也可以在 Chat view 中按右鍵並選擇 Diagnostics,查看目前載入的 custom agents、prompt files、instruction files 與 skills,以及相關錯誤資訊。
Claude agent 格式也能在 VS Code 使用嗎?
可以。VS Code 會偵測 .claude/agents 資料夾中的 .md 檔案,並支援 Claude sub-agents 格式。Claude 格式的 frontmatter 常見欄位包含 name、description、tools 與 disallowedTools,其中 tools 與 disallowedTools 會使用逗號分隔字串。