美化 PowerShell:Oh My Posh 全攻略 (2025)
最近把內建的 Windows PowerShell 5.1 直接升級到跨平台的 PowerShell 7,啟動速度、互動補全與外觀自訂一次大進化。於是把這次從「升級 → 權限工具 (gsudo) → Prompt 美化 (Oh My Posh) → 文字/字型 → 終端顏色主題」的完整流程整理成筆記,之後重裝或換機也能快速複製。
這篇你將會獲得:
- 乾淨可重現的 Profile 初始化步驟
- 提升效率的補全與權限操作設定
- 一套漂亮又資訊量足夠的 Prompt 主題
- Windows Terminal 配色與字型建議
先來看看升級前「尚未美化」的樣子,然後開始改造:

PowerShell Profile 準備
之後的功能(自動補全、別名、提示主題等)都會寫進個人 Profile。先確認目前的 $PROFILE 是否存在,沒有就建立。
1 | # 查看目前使用的 Profile 路徑 |
Windows PowerShell 5.1 目錄
舊版(內建)使用的目錄名稱是 WindowsPowerShell。
1 | # 檢查舊版目錄是否存在 |
PowerShell 7 目錄
PowerShell 7 之後改用新目錄 PowerShell,不要混用。
1 | # 檢查新版目錄是否存在 |
安裝 PowerShell 7
使用 winget 最方便:
1 | # 安裝 |
啟用指令歷史 + AI 預測補全
建議在 Profile 中加入 PSReadLine 設定:
1 | # 使用歷史紀錄 (History) + 外掛/擴充來源 (Plugin) 同時提供預測建議。 |
若想立即測試:把以上貼進 notepad $PROFILE 開啟的檔案末端後存檔,再開新視窗生效。
gsudo:快速取得系統權限
gsudo 可視為 Windows 版 sudo,不用每次再手動啟動「以系統管理員身分執行」。
1 | # 安裝 |
在 Profile 中加入別名:
1 | Set-Alias sudo gsudo |
如果在 Windows Terminal 中想建立一個自動提權啟動 PowerShell 7 的命令,可在設定中指定:
1 | gsudo.exe "C:\Program Files\PowerShell\7\pwsh.exe" |

Oh My Posh:Prompt 主題美化
安裝 Nerd Font 字型
先到 Nerd Fonts 官網 下載一款字型(建議 FiraCode / Meslo / JetBrainsMono),安裝後到 Windows Terminal 的該 Profile 內套用,避免符號亂碼。
安裝 Oh My Posh
1 | winget install JanDeDobbeleer.OhMyPosh -s winget |
啟用並指定主題
在 Profile 內加入(可先用 notepad $PROFILE 開啟):
1 | # 初始化(預設主題) |
查看有哪些內建主題:
1 | Get-ChildItem $env:POSH_THEMES_PATH -Recurse -Filter "*.omp.json" |
修改後重新開一個新的 PowerShell 視窗即可看到效果。
安裝 Git(若尚未安裝)
1 | winget install --id Git.Git -e --source winget |
Windows Terminal 主題配色(Schemes)
可到 Windows Terminal Themes 挑選喜歡的色票,將 JSON 片段貼進設定檔的 schemes 陣列,再於對應 Profile 設 "colorScheme" 為該名稱。
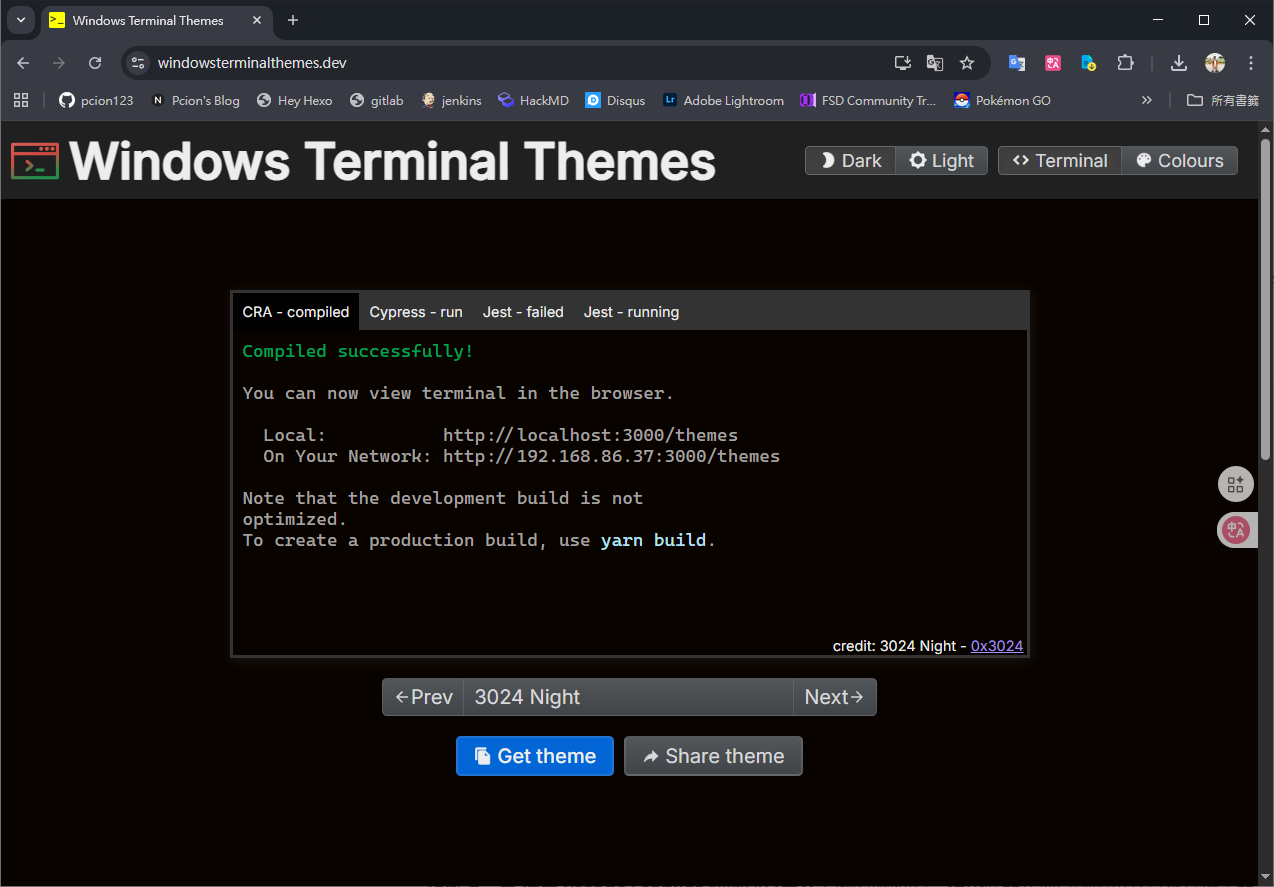
例如 Espresso:
1 | { |
開啟 JSON 設定:
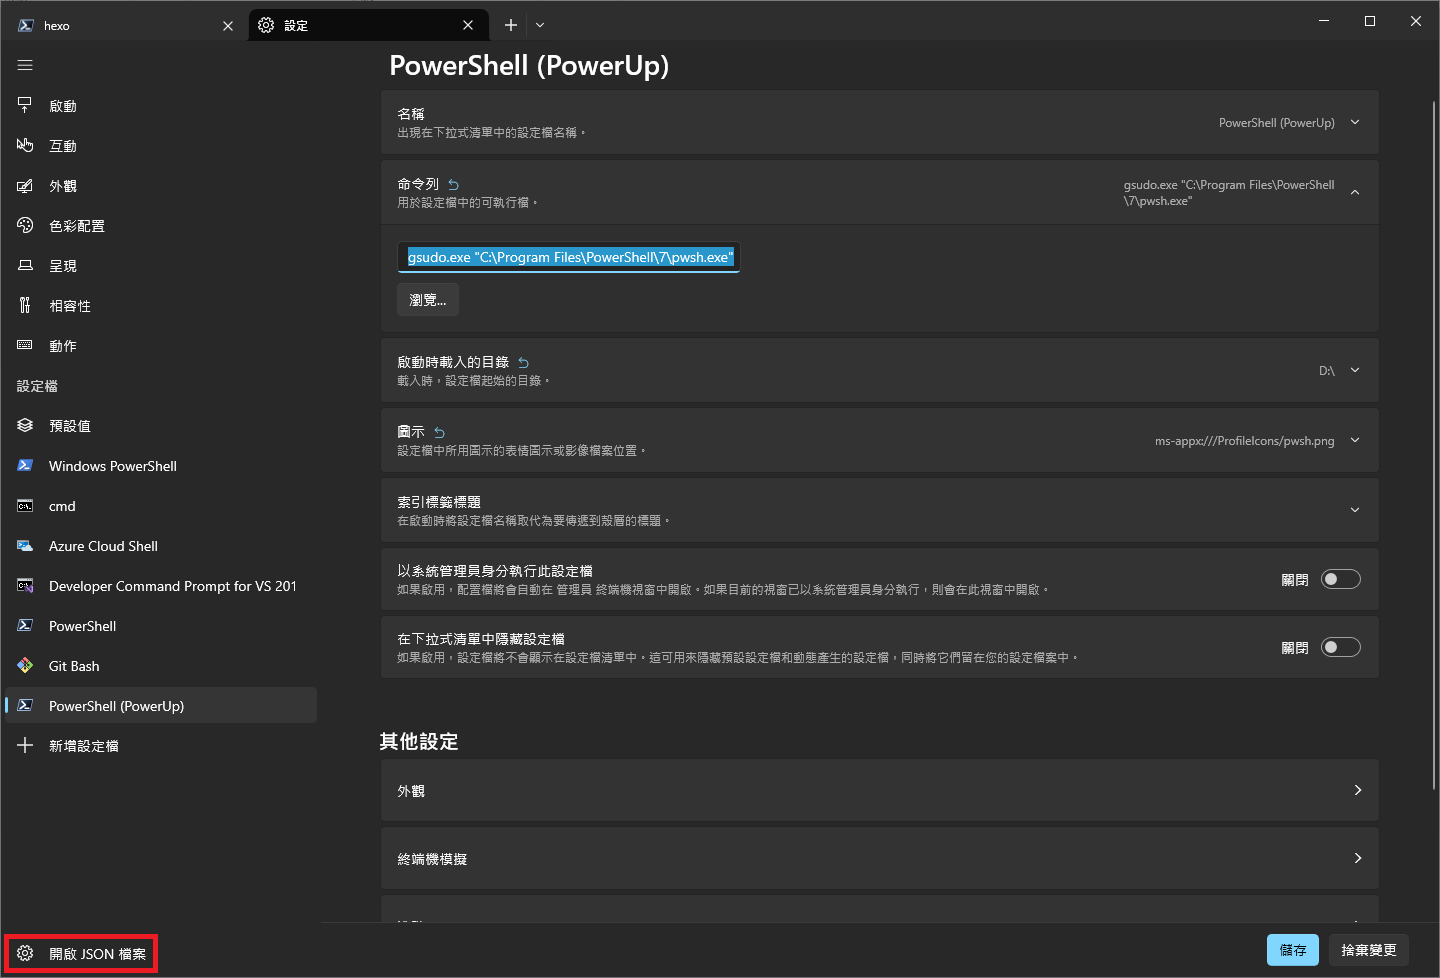
- 將上述片段加入
schemes。 - 在對應的 Profile 中設定:
"colorScheme": "Espresso"。
VS Code 終端機設定
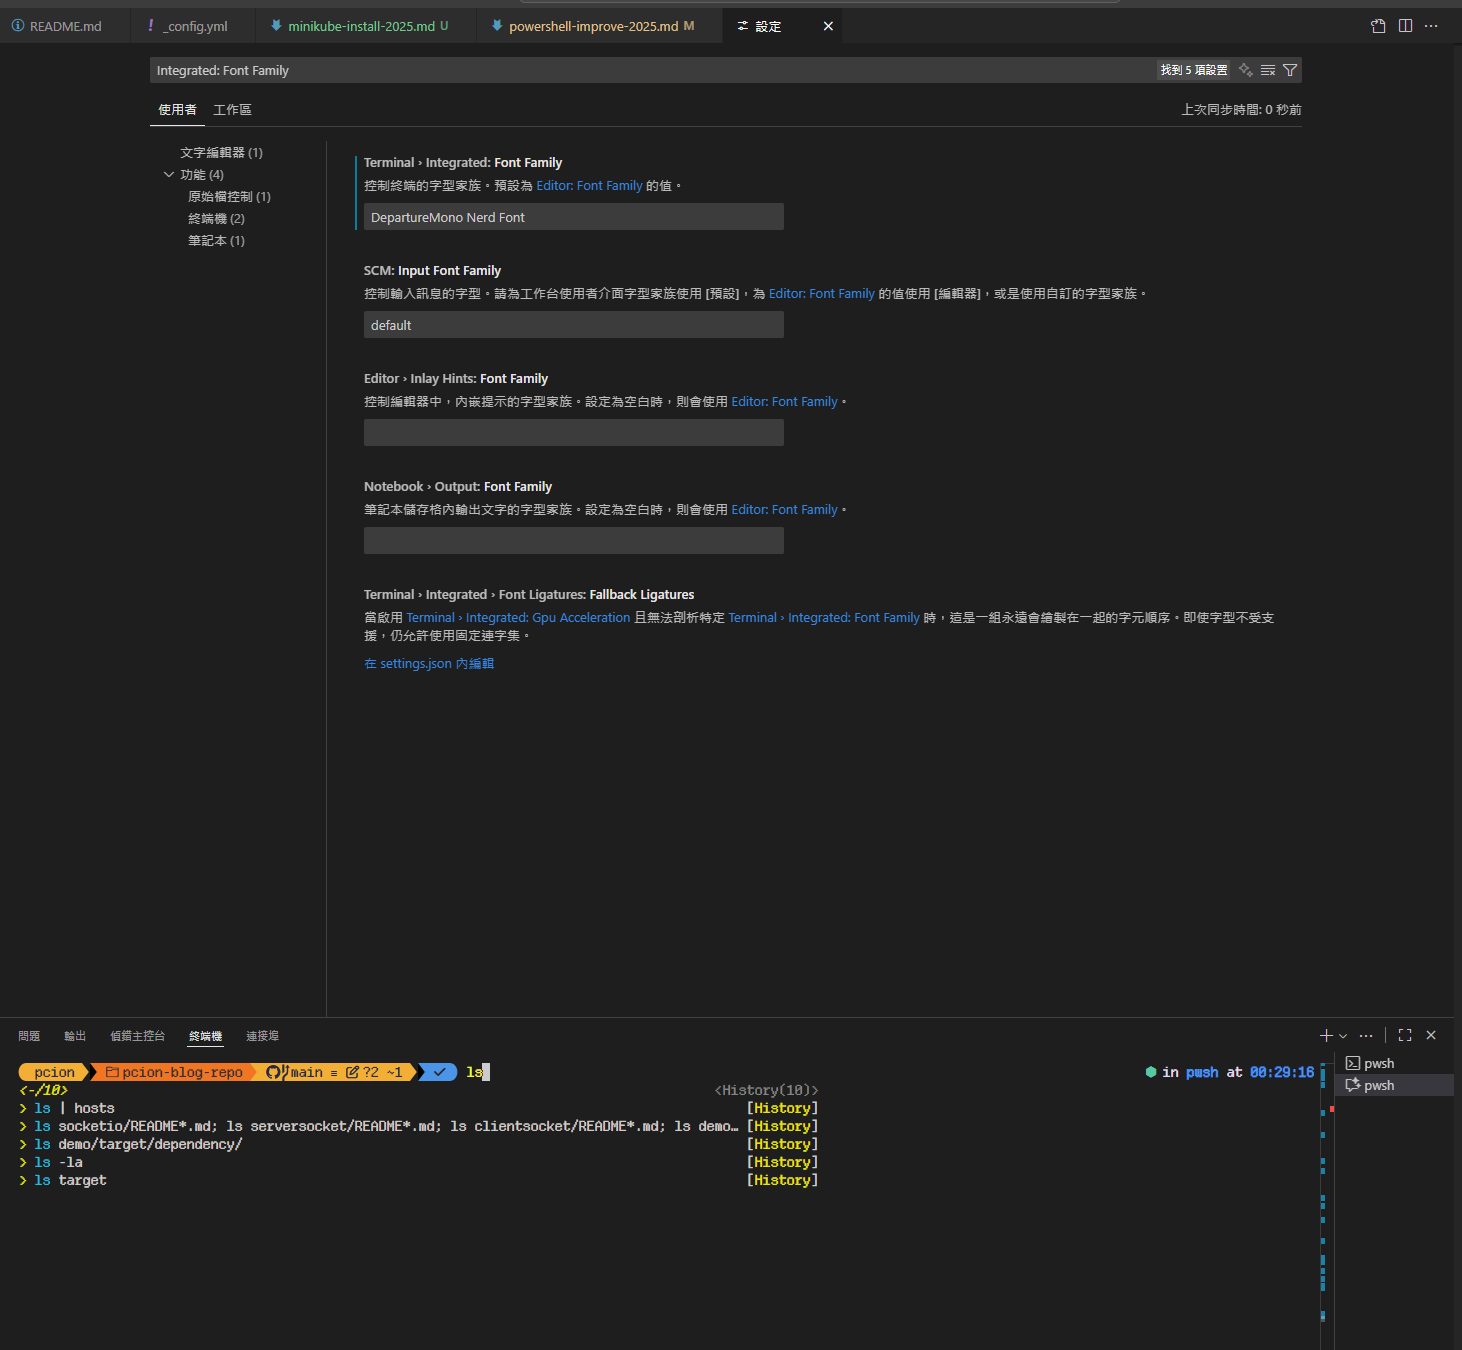
如果你有在使用 VS Code,記得同步調整編輯器內建終端機的字型設定,否則 Oh My Posh 的特殊符號會出現亂碼。
設定步驟
- 開啟 VS Code 設定(
Ctrl + ,或File > Preferences > Settings) - 搜尋
terminal.integrated.fontFamily - 將字型設定為你剛才安裝的 Nerd Font,例如:
1
'FiraCode Nerd Font', 'Meslo LG M DZ for Powerline', Consolas, 'Courier New', monospace
建議設定值
1 | { |
這樣設定後,VS Code 內建終端機就能正確顯示 Oh My Posh 的所有圖示和符號了。
成果展示

希望這篇能幫助你快速打造一個好看、好讀、好用的終端環境。如果你有更喜歡的主題或額外技巧,也歡迎分享交流 🙌